Basic Console Project
The best way to truly learn something is by diving deep into it. That’s precisely what we’ll do right now, combining two fundamental elements: UART and LED Blinking. In this project, the board will communicate with a PC via_UART_. It will serve as a command-line interface, where users are prompted to input commands, triggering actions that we’ll explore in just a moment.
table of contents
Setup
Configure your UART with the default settings. We will use UART in polling mode and not bother with DMA just yet. 115200 baudrate is the maximum speed old UART can give it to you. This baudrate translates to bits per second in our context. If your one sample is 16 bits, then 115200 / 16 = 7200 (half_words per seconds), allowing for the transmission of only 7200 samples per second through this communication line.
Considering the Nyquist Frequency, this setup allows for the transmission of signals up to 3.6 kHz. However, this bandwidth is rather limited for audio processing, particularly when you take into account that the minimum recommended sampling frequency for human speech is 8 kHz. If you plan to use this communication interface for audio processing, you may encounter noisy sounds due to the constrained bandwidth.
Defining Helpful Functions
usart.h
void print_serial(const char* msg);
void clear_reset_terminal();

static const char menu_message[] = "Pick one of the following options\n\n\r1. See details about this program\n\r2. Basic LED control\n\r0. Reset\n\r";
static const char welcome_message[] = "Welcome to Debug Interface!\n\n\r";
static const char details_message[] = "!!!Under Construction!!!\n\rThis is a program about Digital signal processing\n\r";
static const char led_message[] = "LED Control System\n\r1. Orange\n\r2. Green\n\r3. Red\n\r4. Blue\n\r0. Back to Main Menu\n\r";

uint8_t get_input();
void print_welcome_message();
void led_control();
void user_input_control();
void print_menu_message();
void busy_wait_for_input(uint8_t wait_for);
The messages shown to the user are stored as static constants in usart.h. The sequence \n\r is frequently used in console applications to make the carriage return to the beginning of the line after a newline, preventing text from continuing where the previous line left off. It’s important to note that the order of \n\r and \r\n does not matter; they are functionally equivalent.
The UART communicates through byte packages, which a computer can translate into character data, typically in the form of char or, in this case, uint8_t. These functions are designed to simplify the development process.
Writing Functions
These are the codes I wrote at the end of the usart.c file. I share you all but the first parts which was generated by CubeMX. As remainder all files can be found in the GitHub repo.
The keynotes
-
The
init_codeandclear_codeare magical words of console applications, namely ANSI escape codes, that moves the cursor and clears the screen. Make sure that your console application supports these codes. -
We are using
tx_bufferandrx_bufferto transmit and send data through UART. Ensure that you adjust the buffer sizes accordingly.
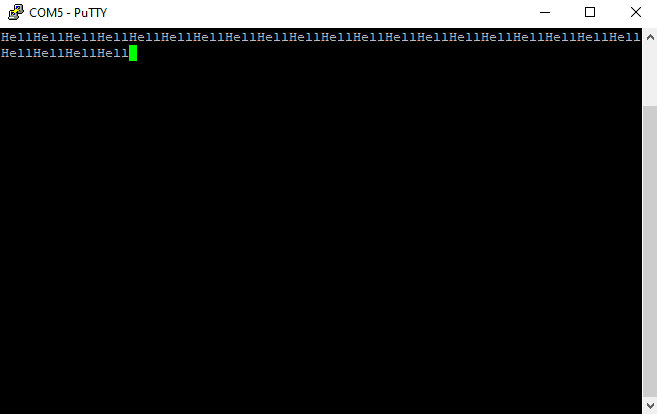
If tx_buffer is too low, expect to see the -Hell-o World!
- The other sections should be self-explanatory. Feel free to explore them further and dive into the details!
UART Functions
usart.c
/* USER CODE BEGIN 1 */
#define init_code "\033[H\033[J"
#define clear_code "\033[2J"

uint8_t tx_buffer[1024] = {};
uint8_t rx_buffer[1] = {0};

void clear_buffer(uint8_t *buffer) {
    for (int i = 0; buffer[i] != '\0'; ++i) {
        buffer[i] = '\0';
    }
}

void clear_reset_terminal() {
    HAL_UART_Transmit(&huart2, (uint8_t *) init_code, strlen(init_code), HAL_MAX_DELAY);
    HAL_UART_Transmit(&huart2, (uint8_t *) clear_code, strlen(clear_code), HAL_MAX_DELAY);
}

void print_serial(const char* msg) {
    clear_buffer(tx_buffer);
    for (int i = 0; i < strlen(msg); ++i) {
        tx_buffer[i] = msg[i];  // maybe define more complex so give errors if something happens
    }
    HAL_UART_Transmit(&huart2, tx_buffer, 1024, HAL_MAX_DELAY);
}

uint8_t get_input() {
    clear_buffer(rx_buffer);
    print_serial("\n\rwaiting input:\n\r");
    print_serial("> ");
    HAL_UART_Receive(&huart2, rx_buffer, 1, HAL_MAX_DELAY);
    print_serial("\033[K\033[F\033[K\033[F");  // delete waiting input message
    return rx_buffer[0];
}

void busy_wait_for_input(uint8_t wait_for) {
    print_serial("\n\rPress 0 to go back main menu\n\r");
//    print_serial("> ");
    uint8_t input;
    do {
        input = get_input();
    } while (input != wait_for);
    clear_reset_terminal();
}

void print_welcome_message() {
    clear_reset_terminal();
    print_serial(welcome_message);
}
void print_menu_message() {
    print_serial(menu_message);
}

void led_control() {
    print_serial(led_message);
    uint8_t input = '1';
    while (input != '0') {
        input = get_input();
        switch (input) {
            case '1':
                HAL_GPIO_TogglePin(LD3_GPIO_Port, LD3_Pin);
                break;
            case '2':
                HAL_GPIO_TogglePin(LD4_GPIO_Port, LD4_Pin);
                break;
            case '3':
                HAL_GPIO_TogglePin(LD5_GPIO_Port, LD5_Pin);
                break;
            case '4':
                HAL_GPIO_TogglePin(LD6_GPIO_Port, LD6_Pin);
                break;
            case '0':
                clear_reset_terminal();
                break; // just break and go back to main menu
            default:
                print_serial("\rInput is invalid. Press \'0\' to go back main menu\r");
                break;
        }
    }
    print_serial("Going back to main menu\n\r");
}

void user_input_control() {
    uint8_t is_finished = '0';

    while (is_finished != 1) {
        print_menu_message();
        uint8_t input = get_input();
        switch (input) {
            case '1':
                clear_reset_terminal();
                print_serial(details_message);
                busy_wait_for_input('0');
                break;
            case '2':
                clear_reset_terminal();
                led_control();
                break;
            case '0':
                print_serial("Input control is finished\n");
                is_finished = '1';
                clear_reset_terminal();
                break;
            default:
                clear_reset_terminal();
                print_serial("Invalid input, try again\n\r\n\r");
                break;
        }
    }
    print_serial("DEBUG: main while loop begins again!\n\r");
}
/* USER CODE END 1 */
Final Touch
/* Infinite loop */
/* USER CODE BEGIN WHILE */
while (1)
{
    /* USER CODE END WHILE */
    MX_USB_HOST_Process();

    /* USER CODE BEGIN 3 */
    print_welcome_message();
    user_input_control();

}
/* USER CODE END 3 */
Add these two functions to the main loop. Once that’s done, you can control the LEDs using the command-line program we have developed.
This project is done!